Webmin is one of the best web-based interfaces for system administration for any Unix-like system. It’s completely free and open-source. With Webmin, you can configure services like Apache, PHP, DNS, file sharing, setup user accounts and much more, just by using your web browser. You don’t have to manually edit any Unix configuration files like /etc/password, you can use Webmin to do that. Webmin lets you manage a system from the console or remotely. Lots of servers use Webmin as it’s easy to use even for beginners. If you already know how to use another control panel like cPanel or Ajenti, getting used to Webmin will be much easier for you. You can quickly install a Webmin instance on your server and try it out before deciding whether or not you should use it.
In this tutorial we’ll show you how to install and access Webmin on CentOS/Fedora and Ubuntu/Debian.
You can download Webmin in several package formats from Webmin’s official website. We need the RPM package to install Webmin on CentOS/Fedora.
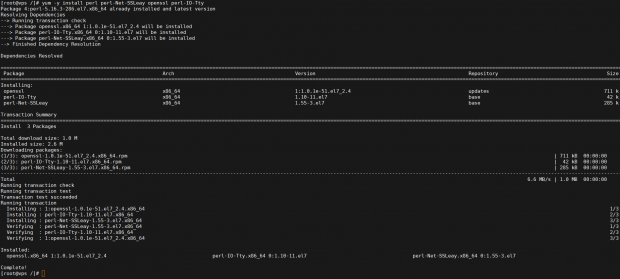
Step 1 – Before proceeding with Webmin’s installation, install the following dependencies:
Step 2 – Find the latest stable Webmin release and install it using the following command:
The installation is done automatically. The administration username is ‘root‘ and its password is your current ‘root‘ password.

You can also create a repository for installing Webmin. Doing it this way you will always have the latest automatic updates via repository.
Step 1 – Create a ‘/etc/yum.repos.d/webmin.repo‘ file:
Put the following lines:
Step 2 – Download and install the GPG key for the package:

Step 3 – You can now install Webmin by executing:
If you want to change your Webmin password, use the following command:
Where ‘NEWPASSWORD‘ will be your new Webmin password.

Step 1 – Download the latest Debian package from Webmin’s official website
Step 2 – install it with the following command:
That’s all. The username is ‘root‘ and its password is your current root password.

To change the Webmin password run the following command:
Where ‘NEWPASSWORD‘ will be your new Webmin password.
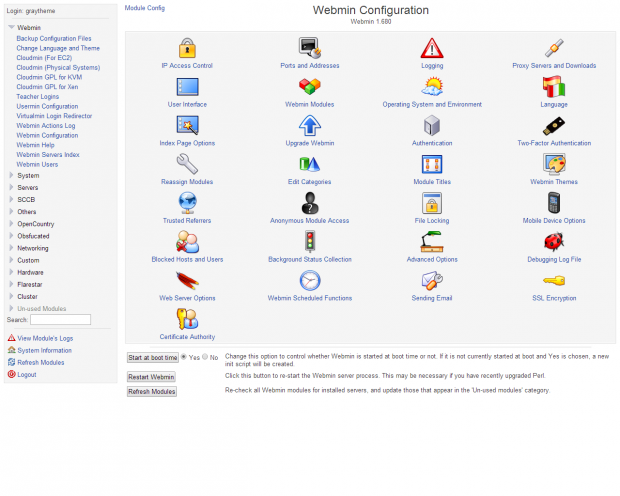
Webmin by default is listening on port 10000 on all Linux distributions. Open a web browser and point it to https://YOURDOMAIN.TLD:10000 , enter ‘root‘ as username and your root password and you are ready to go.

After you log in, you’ll get an easy-to-use, familiar control panel interface for configuring your web server.
In this tutorial we’ll show you how to install and access Webmin on CentOS/Fedora and Ubuntu/Debian.
Install Webmin on CentOS/Fedora
You can download Webmin in several package formats from Webmin’s official website. We need the RPM package to install Webmin on CentOS/Fedora.
Step 1 – Before proceeding with Webmin’s installation, install the following dependencies:
1 | yum -y install perl perl-Net-SSLeay openssl perl-IO-Tty |
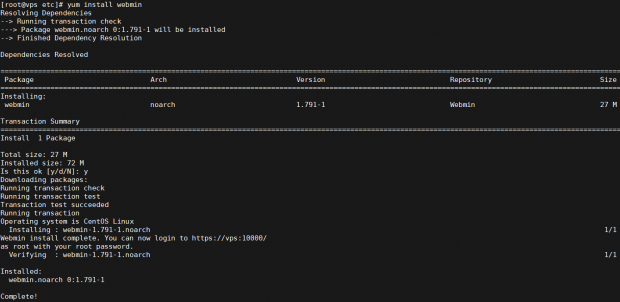
Step 2 – Find the latest stable Webmin release and install it using the following command:
1 | rpm -Uvh http://downloads.sourceforge.net/project/webadmin/webmin/1.791/webmin-1.791-1.noarch.rpm |
The installation is done automatically. The administration username is ‘root‘ and its password is your current ‘root‘ password.
You can also create a repository for installing Webmin. Doing it this way you will always have the latest automatic updates via repository.
Step 1 – Create a ‘/etc/yum.repos.d/webmin.repo‘ file:
1 | nano /etc/yum.repos.d/webmin.repo |
Put the following lines:
1 2 3 4 5 | [Webmin]name=Webmin Distribution Neutral#baseurl=http://download.webmin.com/download/yummirrorlist=http://download.webmin.com/download/yum/mirrorlistenabled=1 |
Step 2 – Download and install the GPG key for the package:
1 2 | wget http://www.webmin.com/jcameron-key.ascrpm --import jcameron-key.asc |
Step 3 – You can now install Webmin by executing:
1 | yum install Webmin |
If you want to change your Webmin password, use the following command:
1 | /usr/libexec/webmin/changepass.pl /etc/webmin root NEWPASSWORD |
Where ‘NEWPASSWORD‘ will be your new Webmin password.
Install Webmin on Ubuntu/Debian
Step 1 – Download the latest Debian package from Webmin’s official website
1 | wget http://downloads.sourceforge.net/project/webadmin/webmin/1.791/webmin_1.791_all.deb |
Step 2 – install it with the following command:
1 | dpkg --install webmin_1.791_all.deb |
That’s all. The username is ‘root‘ and its password is your current root password.
To change the Webmin password run the following command:
1 | /usr/share/webmin/changepass.pl /etc/webmin root NEWPASSWORD |
Where ‘NEWPASSWORD‘ will be your new Webmin password.
How To Access Webmin
Webmin by default is listening on port 10000 on all Linux distributions. Open a web browser and point it to https://YOURDOMAIN.TLD:10000 , enter ‘root‘ as username and your root password and you are ready to go.
After you log in, you’ll get an easy-to-use, familiar control panel interface for configuring your web server.
Comments
Post a Comment