To download this image and follow along with us, visit this episode on Phlearn.com: http://phlearn.com/how-to-create-a-stunning-black-and-white-portrait-in-photoshop
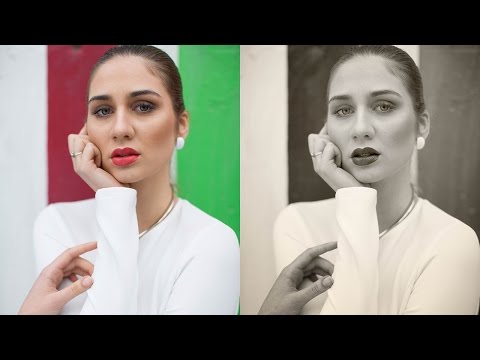
If you think black and white images are simple, think again! Learn how to create a stunning black and white portrait in Photoshop in today's episode!
Converting to Black & White
There are many different ways to convert an image to black and white in Photoshop. For the purposes of this episode, we use the most complete method which is a black and white adjustment layer. This allows an incredible amount of flexibility in terms of editing the tones of the portrait.
To start off (you guessed it) create a black and white adjustment layer. You will notice there are sliders for each color in the image. When working with the skin tones, you will be focusing on the red and yellow sliders. It is really about finding a balance between the two; each photo is different and it will take time and practice to know which colors need to be increased/decreased. For this particular photo, it looks best to increase the yellows and decrease the reds.
If there are other specific colors in the photograph that you would like to change, you can use the sliders for those as well. A helpful trick is to use the hand tool to actually click and drag left and right on the image. Keep in mind, these are global adjustments! If you click and drag on a green stripe in the image, it will also affect all of the other greens throughout.
Tints & Presets
Next up: play with tints! Check the tint box, and then click on the color block to change the color. It tends to look nicer and more natural if the saturation is relatively low. We chose a yellow-orange color and a saturation of around 6% for this image. It creates a really nice warm, sepia look!
Something that many people may not know about black and white adjustment layers in Photoshop is that you can save your adjustments as a preset! This can be very very helpful for instances like batch editing, or if you just like the look you created on your image and would like to use it in the future. Simply click on the icon in the upper right corner of the adjustment window. Then, select "Save Black & White Preset." Name the preset and select the location you would like to save it in. Now, you can go back and select that specific preset for other photos! There are basic presets that Photoshop provides as well.
Flair & Final Touches
Create another new black and white adjustment layer. Next, change the blending mode from Normal to Luminosity. This changes the way the sliders affect the tones in the image, and we have found that it's an efficient and successful way to edit the skin in portraits.
Another nice touch is to use gradients to create vignettes to add on the subject. Choose a radial gradient that goes from black to white, and create the gradient on a new layer (set the blending mode to Soft Light). It's very easy to remake the gradient if you don't like it - all you have to do is click and drag again.
There are infinite possibilities for black and white editing in Photoshop! Hopefully this tutorial inspired you to create some stunning black and white portraits.
Comments
Post a Comment