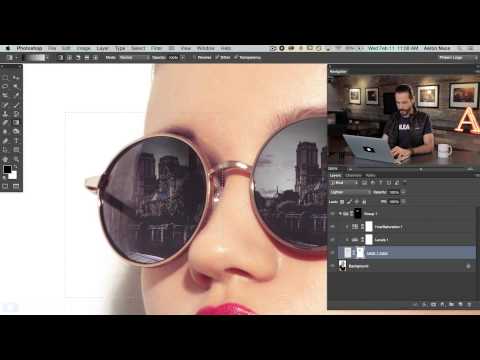
Adding a little Paris to your studio portraits is simpler than you might think! Learn how to add a reflection to sunglasses in today's episode.
Start by scaling the scenery down to the right size. Lower the opacity to see how it will look inside of the lenses. Be aware that only one of the lenses needs to look good, because it will be copied!
Next, select the area right around the lens with the Marquee tool. Go to Select - Inverse, then press the delete key. Now you should have a little square of reflection over one eye. Copy that layer and move it over to be on top of the second eye. Now make the reflection layer invisible and select the Magic Wand tool. We use this to select out the lenses (be sure that “sample all layers” is checked). Use the refine edge tool to soften or bring the edge in a bit. Group those layers with themselves and hit the layer mask button.
To style the reflection so that it doesn’t look fake, create a levels adjustment layer. Darken the darks and mess with the output levels so that it looks more like a reflection. You can add a Hue/Saturation level as well, to match the color from the original lens. In this case, we make it a little bluer and lessen the saturation.
Being able to see through the glasses a little bit is extremely helpful in terms of realism. We use a black to transparent gradient to select areas to be darker, and others to be more see-through.
Now the part you’ve all been waiting for…time to blow some minds! Select the layer that the reflection is on with the Marquee tool. Go to Filter - Distort - Spherize. From here it’s very simple to adjust the slider to a certain amount of curve. This bulges the image out and makes it appear less flat!
Stock Images: http://us.fotolia.com/

Comments
Post a Comment